GitLab Container Registry
Note: This feature was introduced in GitLab 8.8.
Note: This document is about the user guide. To learn how to enable GitLab Container Registry across your GitLab instance, visit the administrator documentation.
With the Docker Container Registry integrated into GitLab, every project can have its own space to store its Docker images.
You can read more about Docker Registry at https://docs.docker.com/registry/introduction/.
Enable the Container Registry for your project
First, ask your system administrator to enable GitLab Container Registry following the administration documentation. If you are using GitLab.com, this is enabled by default so you can start using the Registry immediately.
-
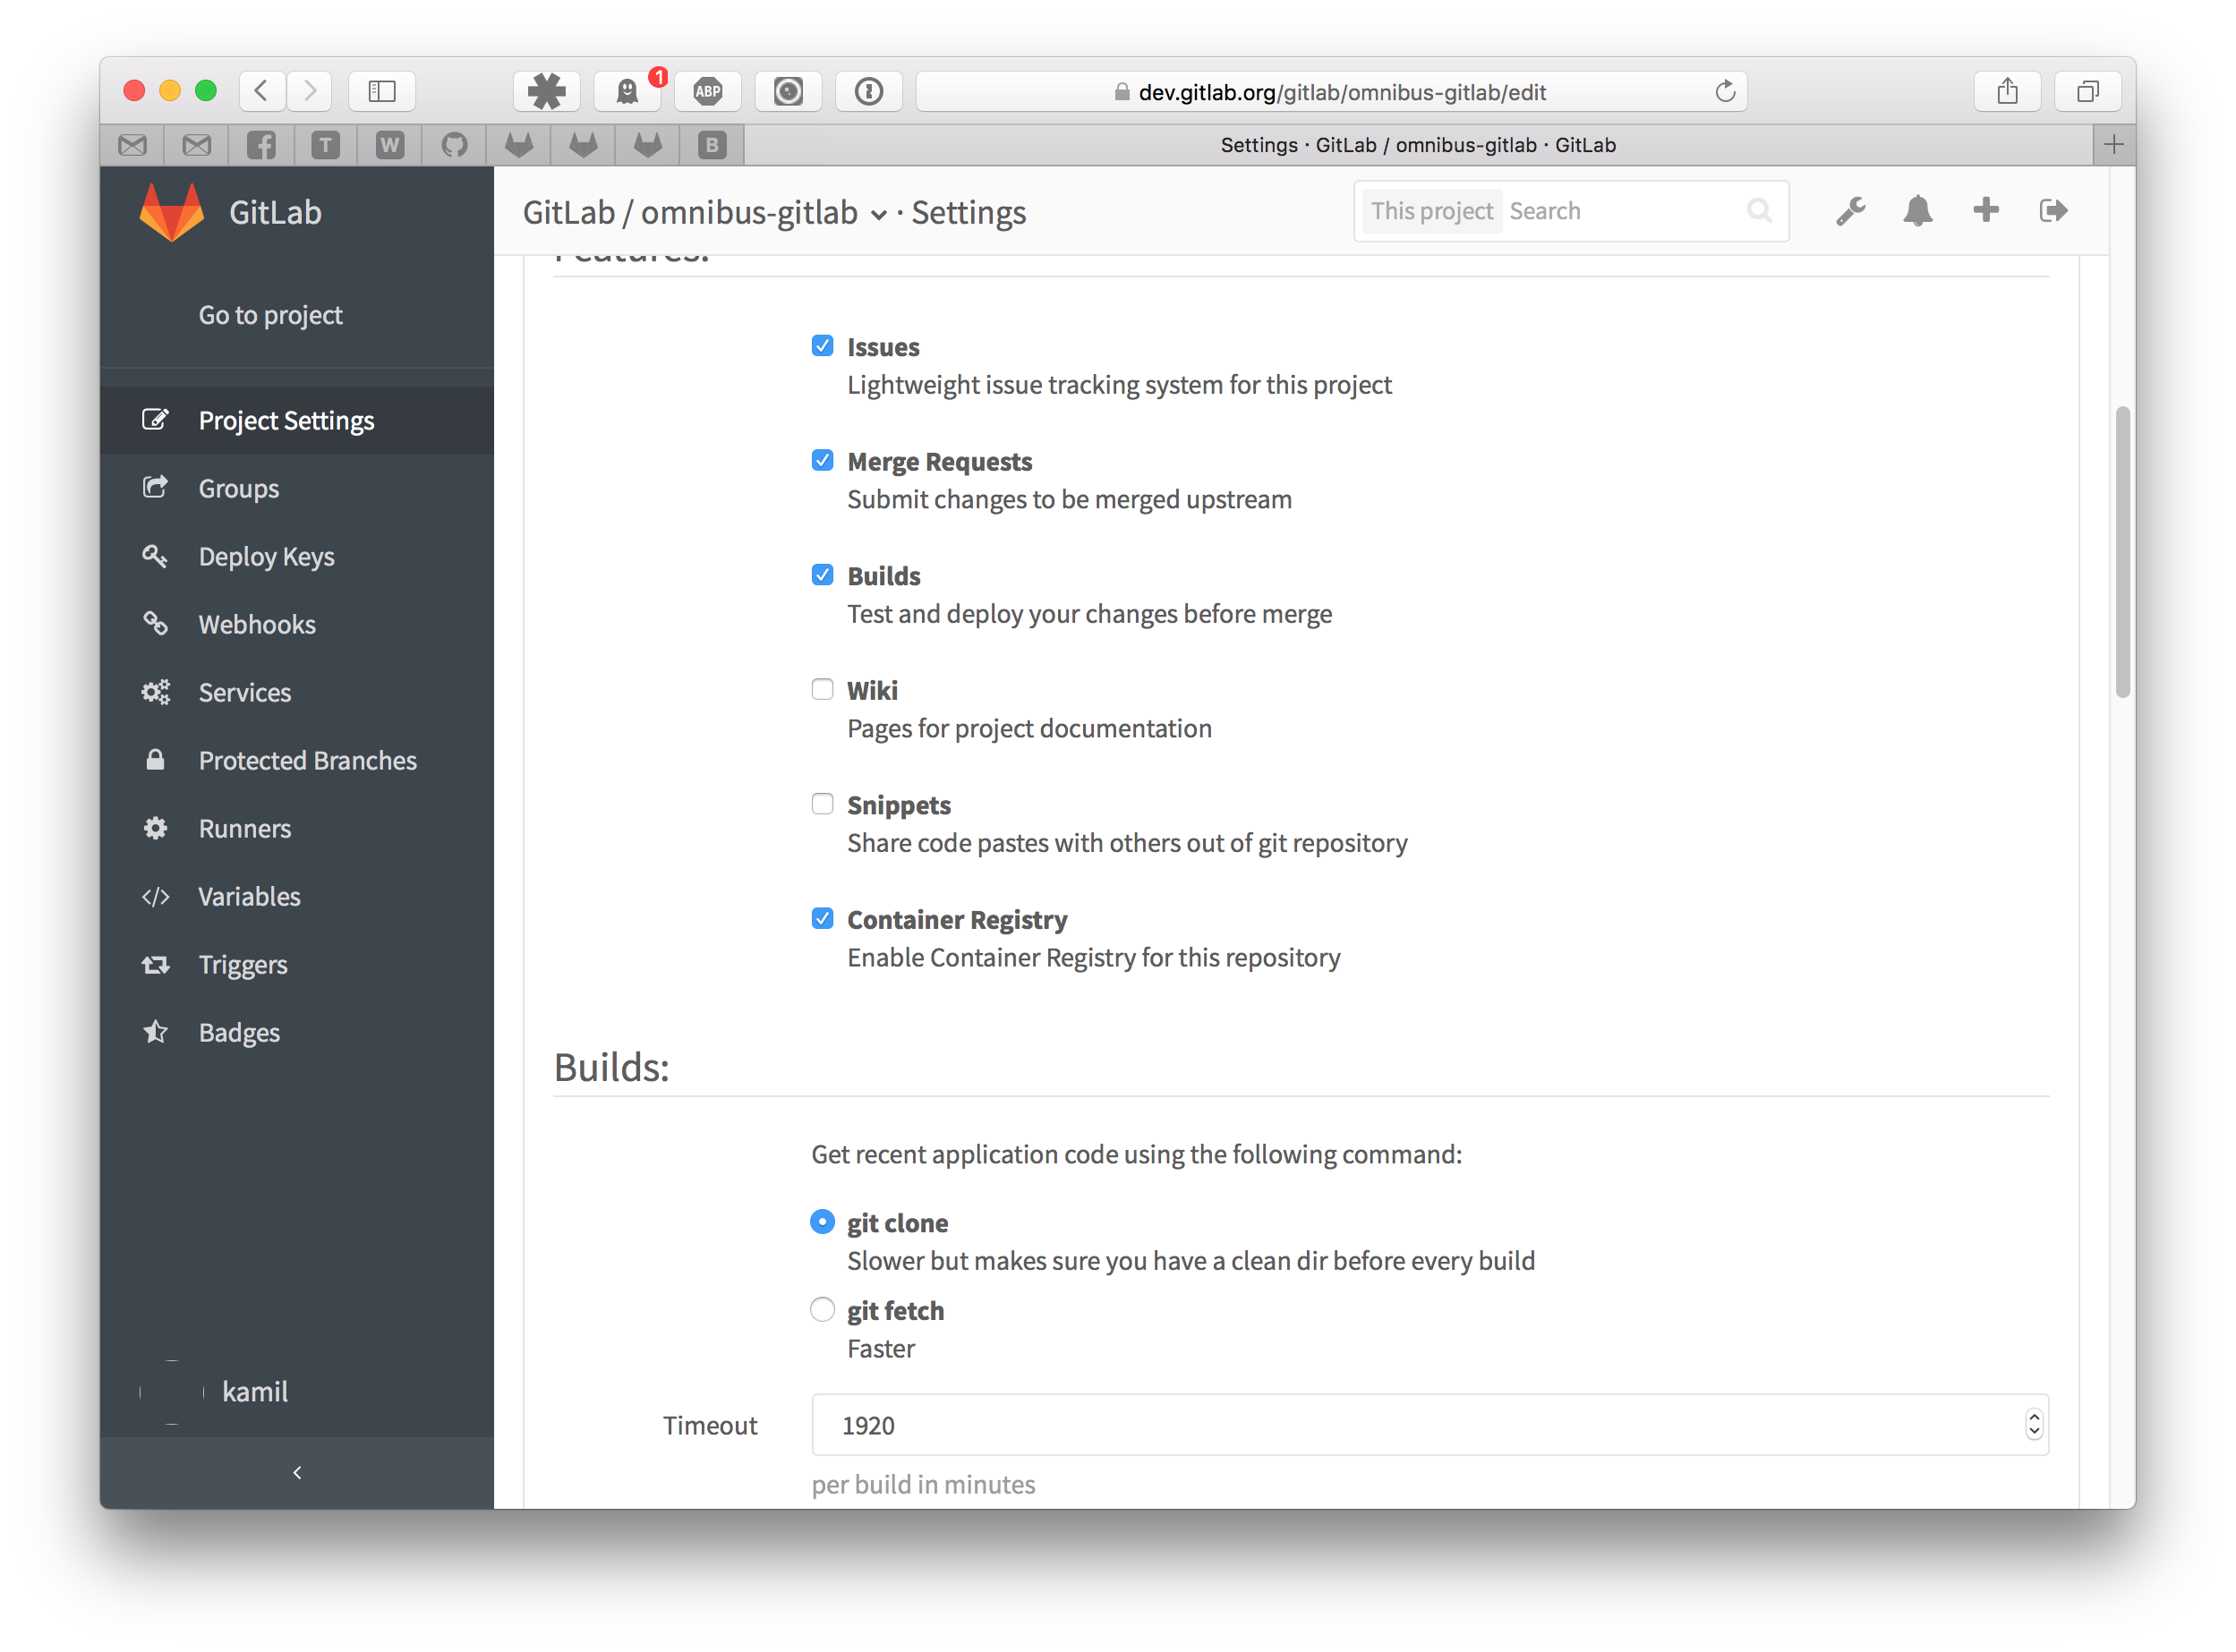
Go to your project's settings and enable the Container Registry feature on your project. For new projects this might be enabled by default. For existing projects you will have to explicitly enable it.
Build and push images
After you save your project's settings, you should see a new link in the sidebar called Container Registry. Following this link will get you to your project's Registry panel where you can see how to login to the Container Registry using your GitLab credentials.
For example if the Registry's URL is registry.example.com, the you should be
able to login with:
docker login registry.example.comBuilding and publishing images should be a straightforward process. Just make sure that you are using the Registry URL with the namespace and project name that is hosted on GitLab:
docker build -t registry.example.com/group/project .
docker push registry.example.com/group/project
Use images from GitLab Container Registry
To download and run a container from images hosted in GitLab Container Registry,
use docker run:
docker run [options] registry.example.com/group/project [arguments]For more information on running Docker containers, visit the Docker documentation.
Control Container Registry from within GitLab
GitLab offers a simple Container Registry management panel. Go to your project and click Container Registry in the left sidebar.
This view will show you all tags in your project and will easily allow you to delete them.
Build and push images using GitLab CI
Note: This feature requires GitLab 8.8 and GitLab Runner 1.2.
Make sure that your GitLab Runner is configured to allow building docker images. You have to check the Using Docker Build documentation.
You can use docker:dind to build your images,
and this is how .gitlab-ci.yml should look like:
 build_image:
   image: docker:git
   services:
   - docker:dind
   stage: build
   script:
     - docker login -u gitlab-ci-token -p $CI_BUILD_TOKEN registry.example.com
     - docker build -t registry.example.com/group/project:latest .
     - docker push registry.example.com/group/project:latest
You have to use the credentials of the special gitlab-ci-token user with its
password stored in $CI_BUILD_TOKEN in order to push to the Registry connected
to your project. This allows you to automated building and deployment of your
Docker images.
Limitations
In order to use a container image from your private project as an image: in
your .gitlab-ci.yml, you have to follow the
Using a private Docker Registry
documentation. This workflow will be simplified in the future.

